
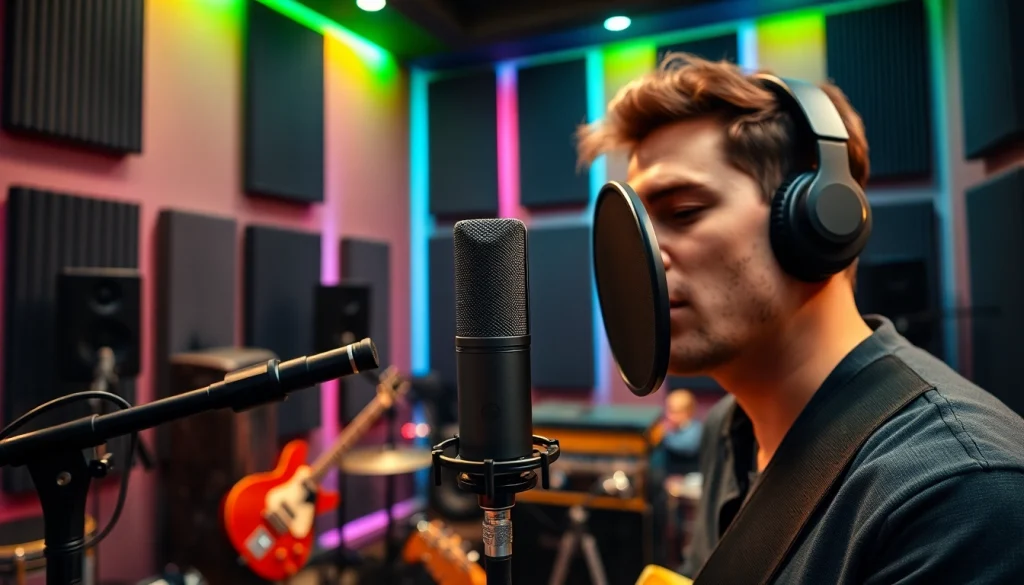
Understanding the MV88 Microphone
When it comes to capturing high-quality audio, the MV88 microphone stands out as an essential tool for musicians, podcasters, and content creators alike. Its portability, performance, and array of features make it an ideal choice, whether for field recording or studio use. In this section, we will delve into the features and specifications that set the MV88 apart from the competition, how it compares to other microphones in the market, and the diverse use cases that highlight its versatility across different settings.
Features and Specifications of the MV88
The MV88 microphone is engineered specifically for mobile devices, making it a perfect companion for musicians on the go. Here are some of its standout features:
- Digital Connection: The MV88 features a Lightning connector, which means it can connect directly to iOS devices for high-quality digital audio recording.
- Compact Size: Its small form factor allows users to carry it easily in their pockets, making it extremely portable.
- Adjustable Stereo Width: Users can manually adjust the stereo width from 60 to 135 degrees, allowing for tailored recording settings based on the application.
- Built-in Microphone Preamp: This feature enhances sound quality by reducing background noise and improving gain control.
- App Compatibility: The microphone works seamlessly with the ShurePlus MOTIV app, providing advanced recording options, EQ settings, and monitoring capabilities.
How the MV88 Compares to Other Microphones
In the competitive landscape of portable microphones, the MV88 holds its ground against leading products such as the Rode VideoMic Me and Apogee MiC Plus. While the Rode VideoMic Me emphasizes directional audio capture, ideal for video recording, the MV88’s adjustable stereo width offers more versatility. On the other hand, while the Apogee MiC Plus provides high-definition recording, it falls short in portability compared to the MV88’s compact design and lightweight build. Thus, the MV88 offers an excellent balance between mobility, sound quality, and adaptability for various recording scenarios.
Use Cases for the MV88 in Different Settings
The MV88 excels across multiple recording environments. Here are some practical applications:
- Field Recording: Its compactness allows for easy travel, enabling users to capture ambient sounds or interviews outdoors.
- Music Production: Musicians can use the MV88 to record rehearsals or high-quality demos directly from their mobile devices.
- Podcasting: With its clarity and adjustable settings, the MV88 provides podcasters with the ability to achieve professional sound quality without complex setups.
- Video Production: Content creators can integrate the MV88 with their iOS devices to elevate the audio quality of their video projects.
Setting Up Your MV88 Microphone
Setting up the MV88 is straightforward, providing an excellent user experience thanks to its intuitive design. This section outlines the necessary equipment, a step-by-step guide to setup, and common mistakes to avoid during the process.
Required Equipment and Software
To effectively use the MV88, you’ll need the following equipment:
- iOS Device: Ensure you have an iPhone, iPad, or iPod Touch with a Lightning port.
- ShurePlus MOTIV App: Download this app for optimal recording functionality tailored to the MV88’s capabilities.
- Headphones: For monitoring recordings in real time, a pair of good headphones is recommended.
Step-by-Step Setup Guide
Here is a simple guide to help you set up your MV88 microphone:
- Connect the Microphone: Plug the MV88 into your iOS device’s Lightning port.
- Open the ShurePlus MOTIV App: If you have not downloaded it yet, do so from the App Store.
- Select Your Input: Within the app settings, select the MV88 as your input device.
- Adjust Settings: Tailor your microphone settings, such as stereo width and EQ settings, according to your recording needs.
- Monitor and Record: Plug in your headphones to monitor audio while recording.
Common Setup Mistakes to Avoid
To ensure a smooth recording experience, it’s important to avoid common setup mistakes:
- Incorrect App Settings: Always double-check that the MV88 is selected as the input device in the app settings.
- Neglecting to Test Levels: Before beginning a full recording, conduct a test to ensure optimal audio levels and sound quality.
- Poor Microphone Placement: Ensure the microphone is positioned correctly relative to the sound source to avoid unwanted background noise or audio distortion.
Recording Techniques with the MV88
To maximize the capabilities of the MV88 microphone, employing effective recording techniques is crucial. This section outlines best practices for achieving optimal sound, placement tips for various scenarios, and how to use the MV88 during live performances.
Best Practices for Achieving Optimal Sound
To ensure high-quality recordings, keep these best practices in mind:
- Use Windshields: If recording outdoors, always use a windshield to minimize wind noise.
- Monitor Audio Levels: Use headphones to monitor the sound while recording, as this will help you catch issues in real-time.
- Record in Quiet Environments: Choose your recording location wisely, ensuring minimal background noise for cleaner audio quality.
Placement Tips for Various Scenarios
Microphone placement can dramatically affect sound quality. Here are some placement tips:
- Interviews: Place the MV88 equidistant between the two speakers to create an even sound balance.
- Instruments: For recording instruments, angle the MV88 towards the sound source and at a slight distance to capture a fuller sound.
- Vocals: For vocal recordings, position the microphone approximately 6-12 inches away from the singer’s mouth for best results.
Using the MV88 for Live Performances
The MV88 is not just a recording tool; it can be effectively used for live performances as well. Here are some tips:
- Sound Check: Always perform a sound check before the event to ensure optimal levels and minimal interference.
- Adapt Settings On-the-Fly: Use the ShurePlus MOTIV app during the performance to make quick adjustments to sound quality.
- Positioning: Ensure the microphone is positioned to capture both vocals and instruments adequately to create a cohesive sound.
Editing and Enhancing Your Recordings
After making recordings with the MV88, the next step is editing and enhancing the audio quality. This section covers software options for post-production, techniques to improve audio quality, and how to integrate the MV88 with Digital Audio Workstations (DAWs).
Software Options for Post-Production
Editing software plays a significant role in enhancing your recordings. Here are some popular options:
- Adobe Audition: A comprehensive audio editing tool that allows you to clean up audio, adjust levels, and apply effects.
- GarageBand: A user-friendly software for Mac users, ideal for music production and editing.
- Audacity: This free, open-source software offers robust audio editing capabilities suitable for beginners and professionals alike.
Techniques to Improve Audio Quality
Enhancing audio quality during editing can dramatically impact the final product. Here are some techniques:
- Noise Reduction: Use noise reduction tools to eliminate background noise and enhance voice clarity.
- Equalization: Adjust frequencies with EQ settings to emphasize vocals or instruments and create a balanced mix.
- Compression: Apply compression to even out audio levels, ensuring quiet sounds are audible while loud sounds do not distort.
Integration with Digital Audio Workstations
The MV88’s compatibility with DAWs allows seamless integration for professionals. Here’s how to set it up:
- Connect the MV88: Use the Lightning connection to connect your iOS device to your computer if your DAW supports it.
- Setup DAW: Open your DAW and select the MV88 as your audio input source.
- Begin Recording: Proceed with your recording within the DAW, benefiting from its comprehensive editing features.
Real-World Applications of the MV88
The MV88 is versatile, being applicable in numerous scenarios. This section explores best practices for interviews and podcasts, recording instruments and vocals, and launching music projects using the MV88.
Interviews and Podcasts: Best Practices
When using the MV88 for interviews and podcasts, consider these best practices for success:
- Prepare Questions: Structure your interview in advance to ensure a smooth flow of conversation.
- Choose a Quiet Space: Minimize background noise by selecting quieter locations for recording.
- Engage Your Guest: Encourage natural conversation to capture genuine responses from your interview subjects.
Recording Instruments and Vocals
For musicians, the MV88 provides a powerful tool to accurately record instruments and vocals. Here are some tips:
- Microphone Placement: Place the MV88 appropriately relative to the instrument or singer for optimal sound capture.
- Record at Appropriate Levels: Ensure levels are neither too high (to avoid clipping) nor too low (to maintain clarity).
- Experiment with Settings: Don’t hesitate to experiment with the MV88’s settings to find the ideal sound profile for your music.
Launching Your Music Projects with the MV88
The MV88 can play a significant role in launching your music projects successfully:
- Demo Recording: Use the MV88 to record high-quality demos for producers or labels.
- Social Media Sharing: High-quality recordings can enhance your online presence, making your music projects more shareable.
- Collaboration: Leverage the portability of the MV88 to collaborate with other musicians easily, no matter the location.